Lessons from the Field
Real-world experience from an amateur DIY enthusiast.
Planning & Site
No balcony? You'll need somewhere for the panels to go — and it needs checking properly.
Big rigid panels aren't small. If you're not mounting on a balcony rail, you need somewhere out of the way — and that means a proper structural check, not just a look. I checked my own pergola posts expecting them to be fine. They were solid, but every single post had cracks running down it. Ruled out on the spot.
A 460W panel is a peak label, not an everyday output.
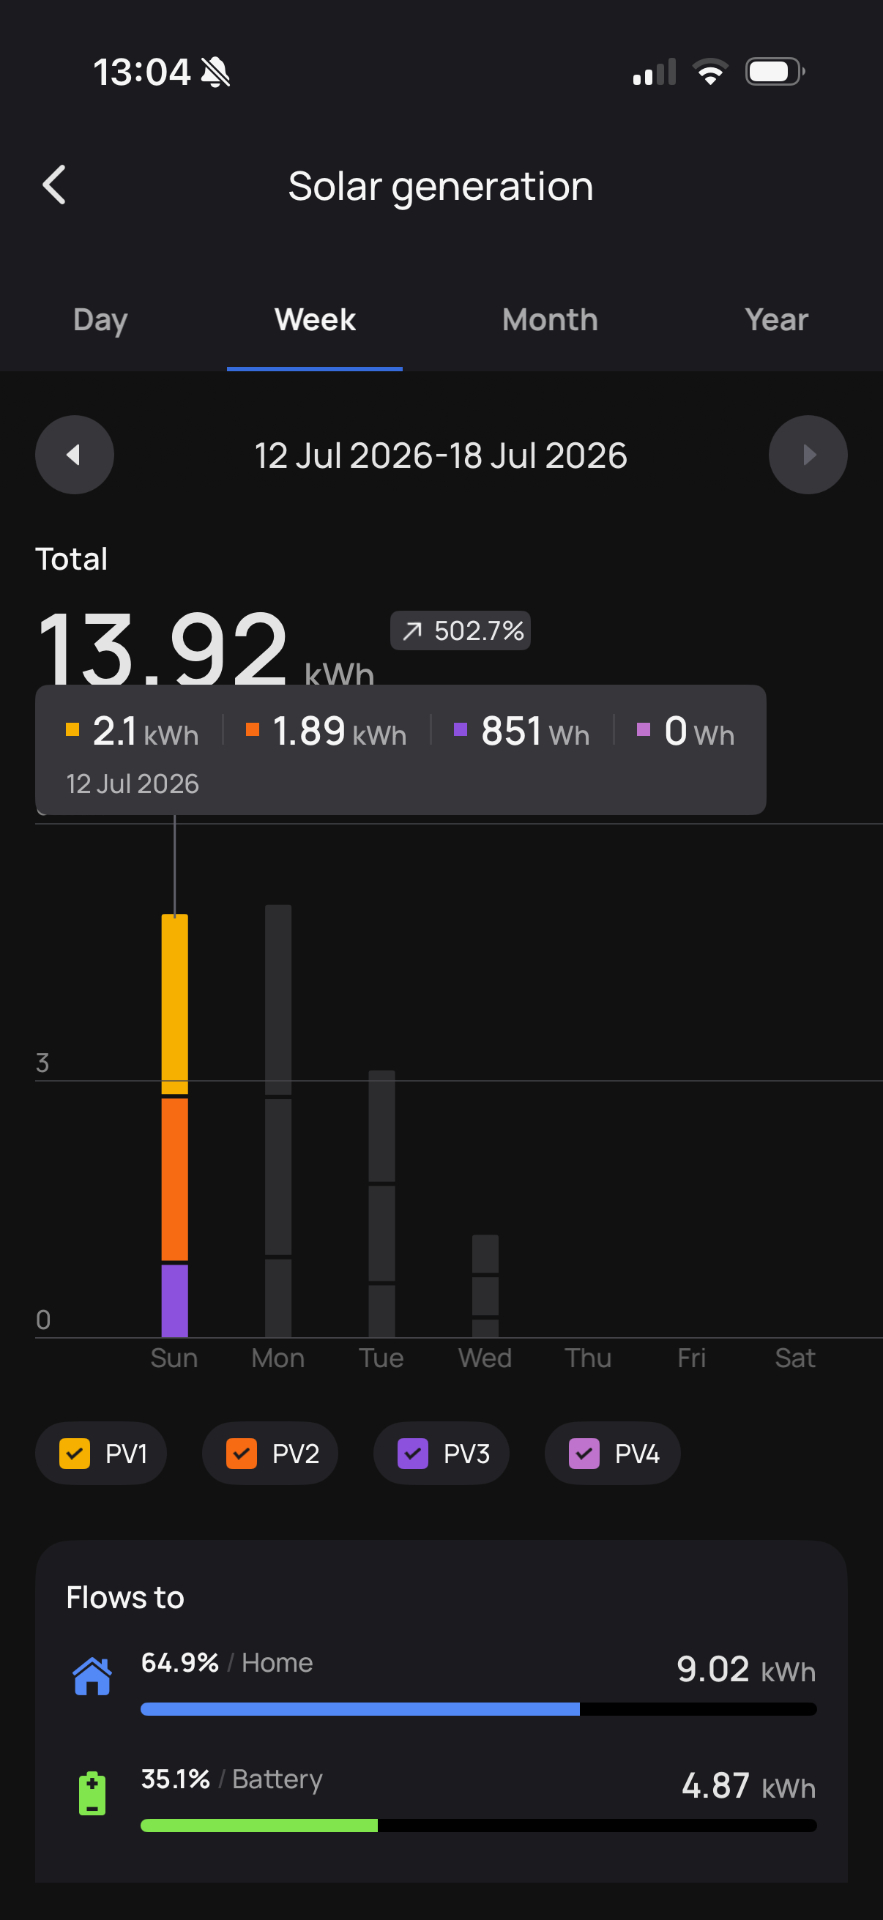
On a sunny July day, a south-facing 460W panel at 34° topped out at about 384W and produced roughly 2.84kWh total. That's good output, but well below the 460W nameplate — panels rarely hit peak in real conditions. Use that as a realistic guide when sizing your system.
A little shade costs a lot of power.
My third panel is temporarily behind a garden 'pub table' and is only about 20% shaded. The result is a roughly 50% drop in performance compared with the other panels (see PV3 in the screenshot). That's down to how panels are internally wired — even a small shaded area can drag the whole panel's output down. Positioning with shade in mind is as important as chasing the sun.
Three panels can hit 1kW in good conditions.
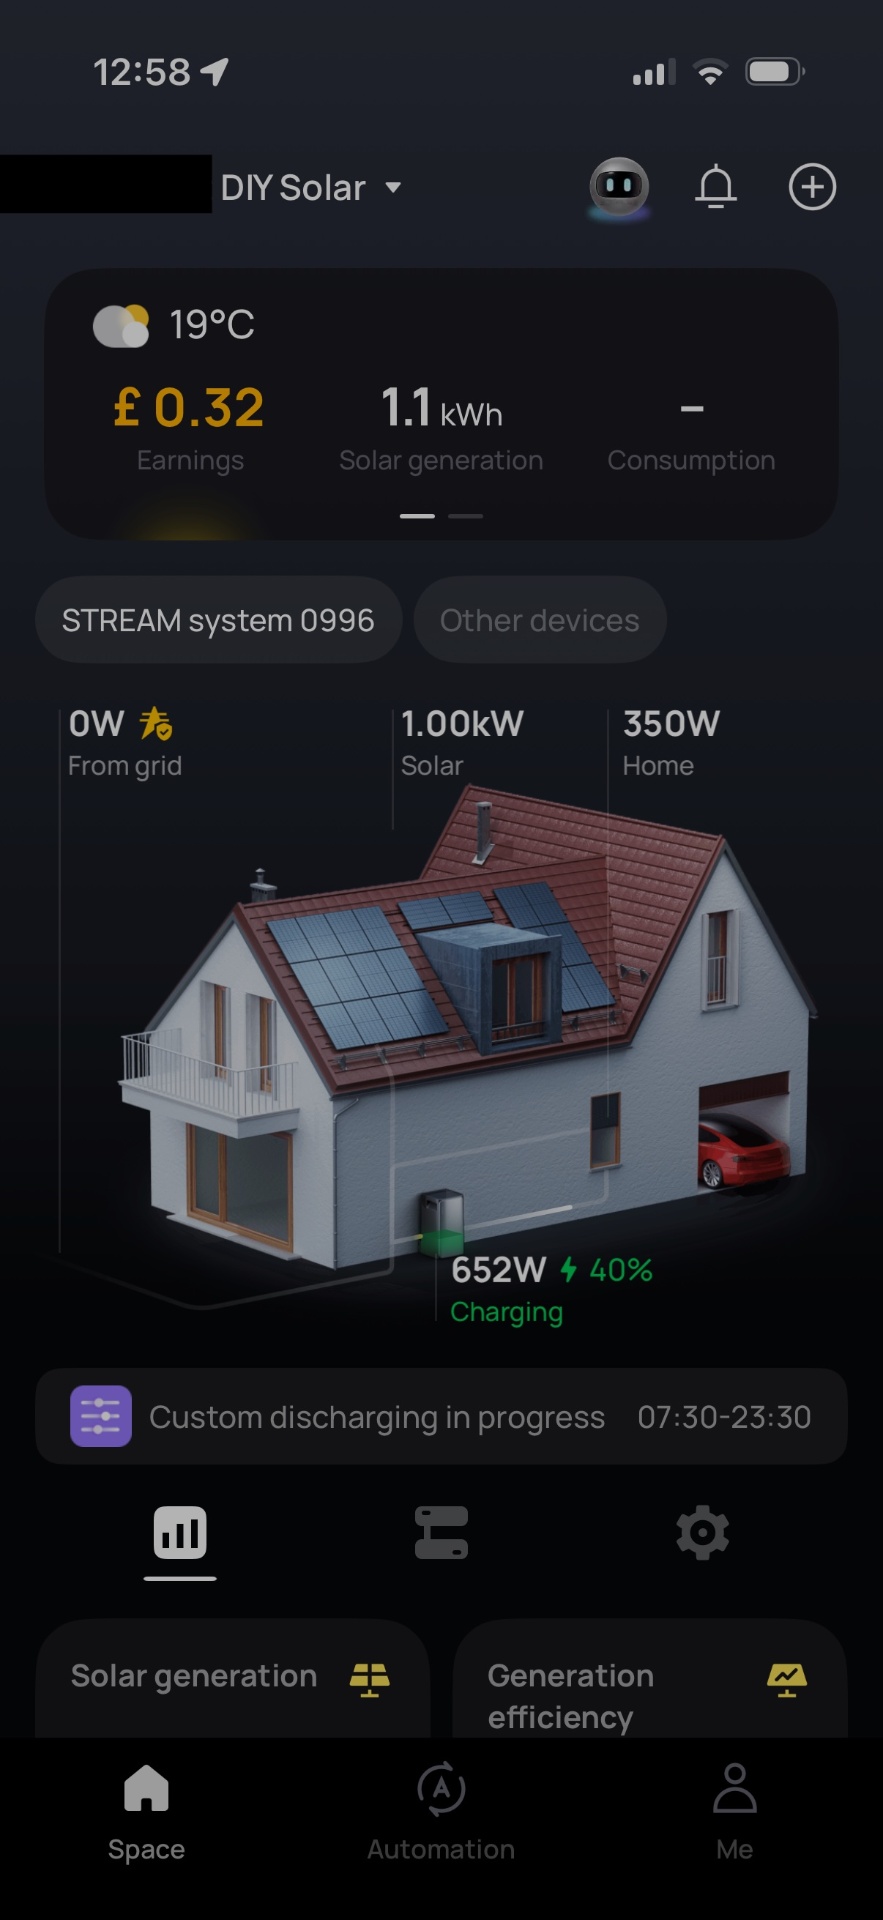
On a decent sunny day my three-panel setup has reached 1.1kW solar generation. That's a useful real-world benchmark: you don't need a huge array to make a meaningful dent in your peak-time load.
Setup & Install
Don't forget the cable bill.
Solar cable is more expensive than you'd expect, and these setups need two cables per panel. Two panels down the garden to a Stream unit in the garage can easily mean 40m of cable. Check that cost before you finalise your layout.
Making up MC4 cables is easier than it looks.
If you use Staubli MC4-Evo ready connectors, no crimping is required — you just push the cable into the connector and screw it tight. It makes custom cable lengths very doable.
View productIf you want them on a roof.
Roofers, understandably, stick to roofing — most weren't interested in solar panels at all. Solar installers weren't interested either — the job was too small for them to bother with. Eventually found a roofer willing to do it with me, on the basis I did the labour. Worth specifically looking for that kind of arrangement rather than assuming a standard installer or roofer will take it on. Note: fixing panels to a roof needs roofing skills, so that part isn't DIY — but everything else can be.
Buy your extension lead now, before you need it.
Backup power means running an extension lead from the Stream's AC sockets to wherever your fridge, freezer, or aquarium is. Don't wait until a power cut to think about this — get a cable reel now and keep it somewhere you can grab it in seconds.
Adding battery expansion is refreshingly simple.
One cable between the EcoFlow Stream and an extra battery (Stream AC) does the job — and they don't even need to be in the same room. About as close to 'plug and play' as home battery expansion gets.
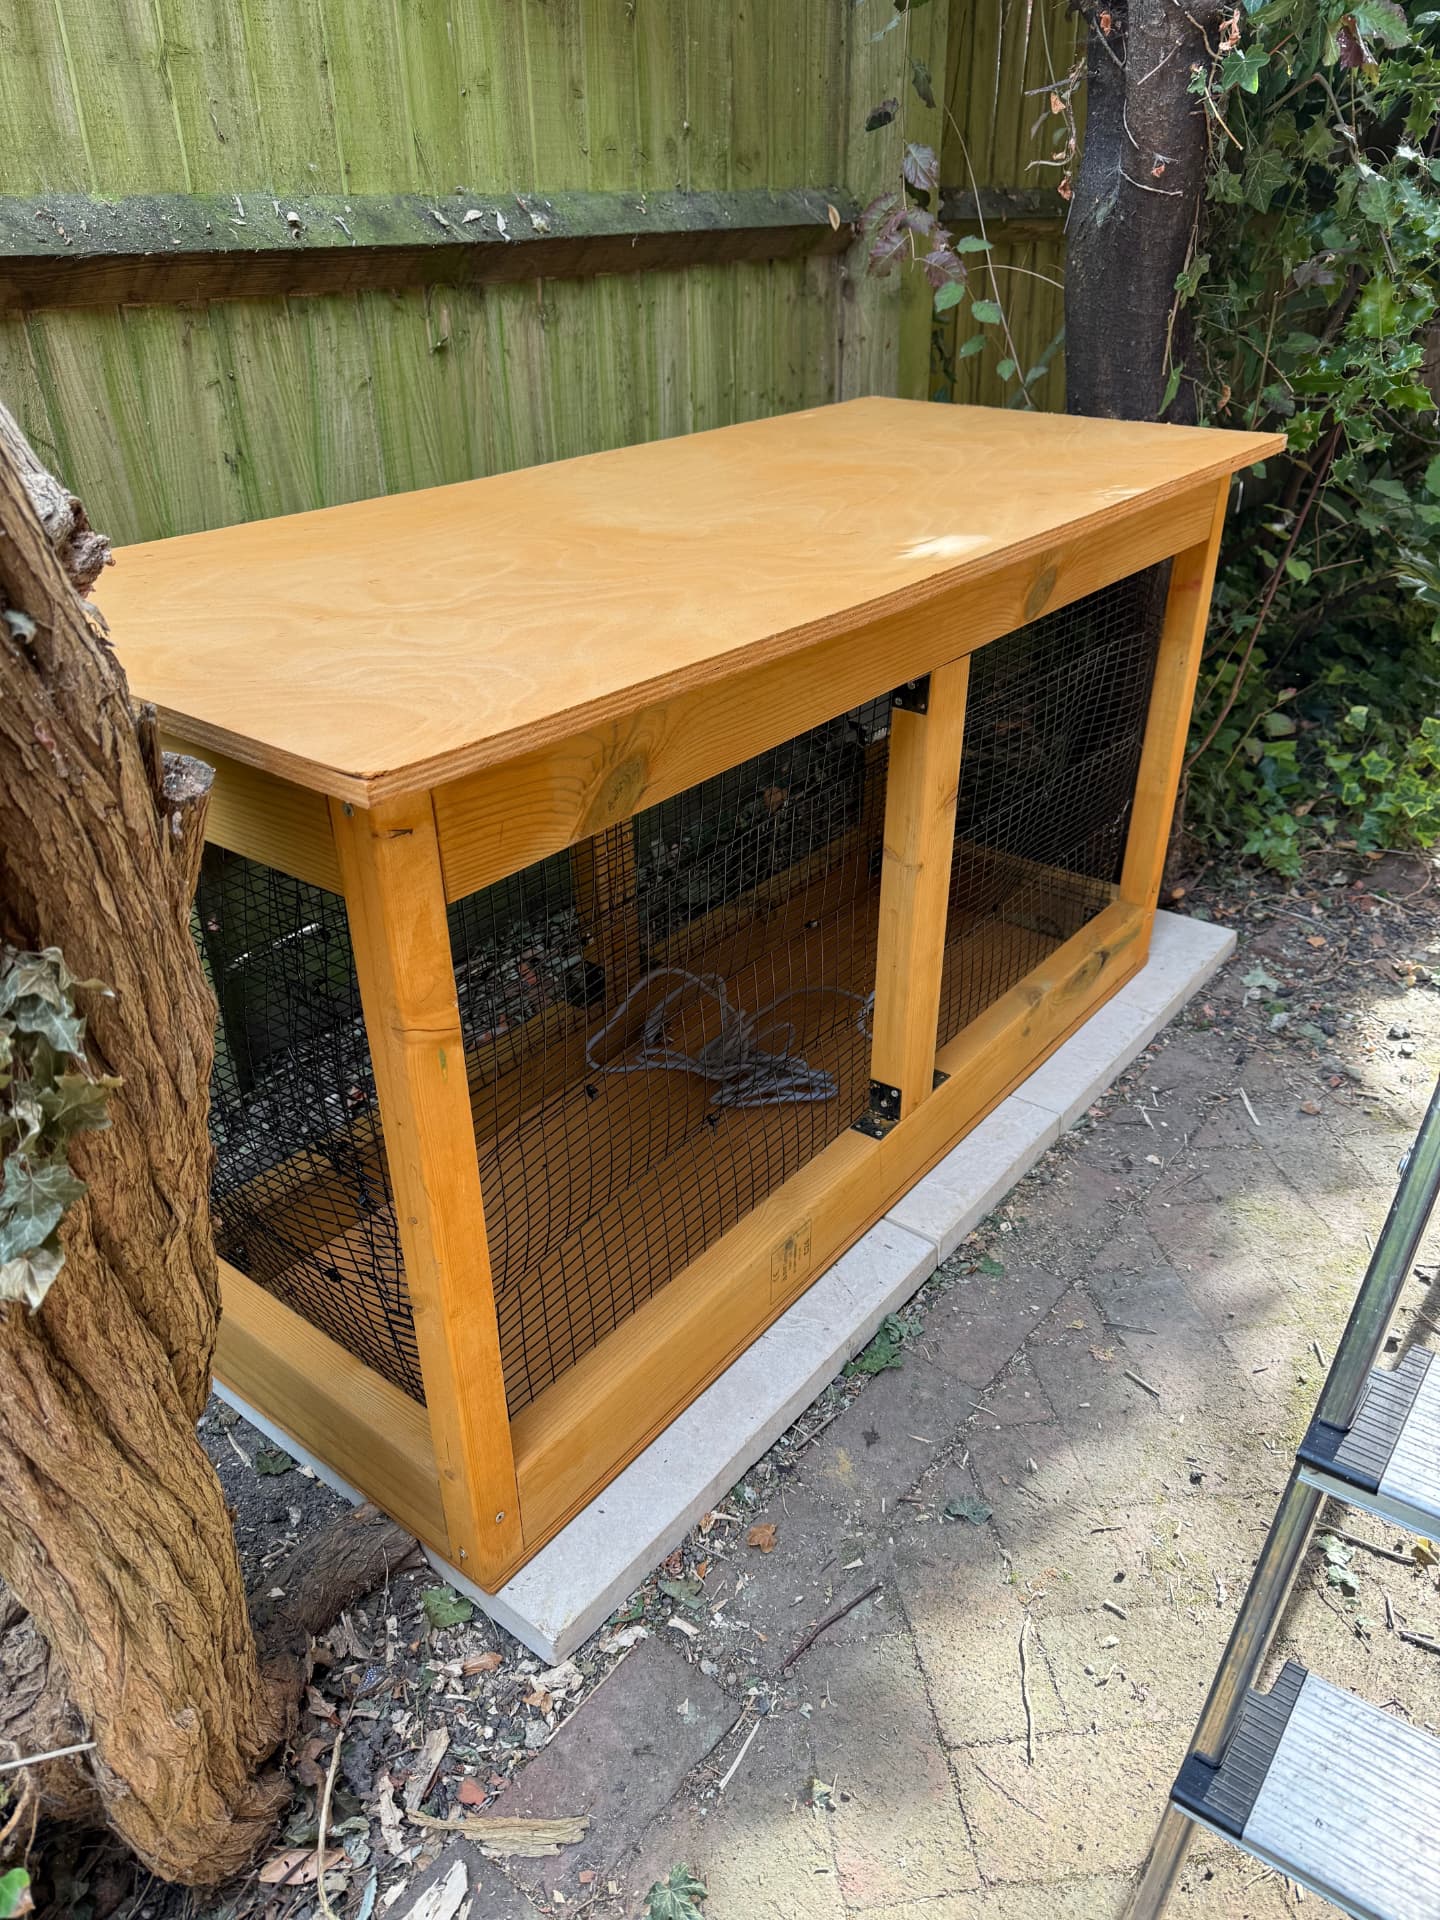
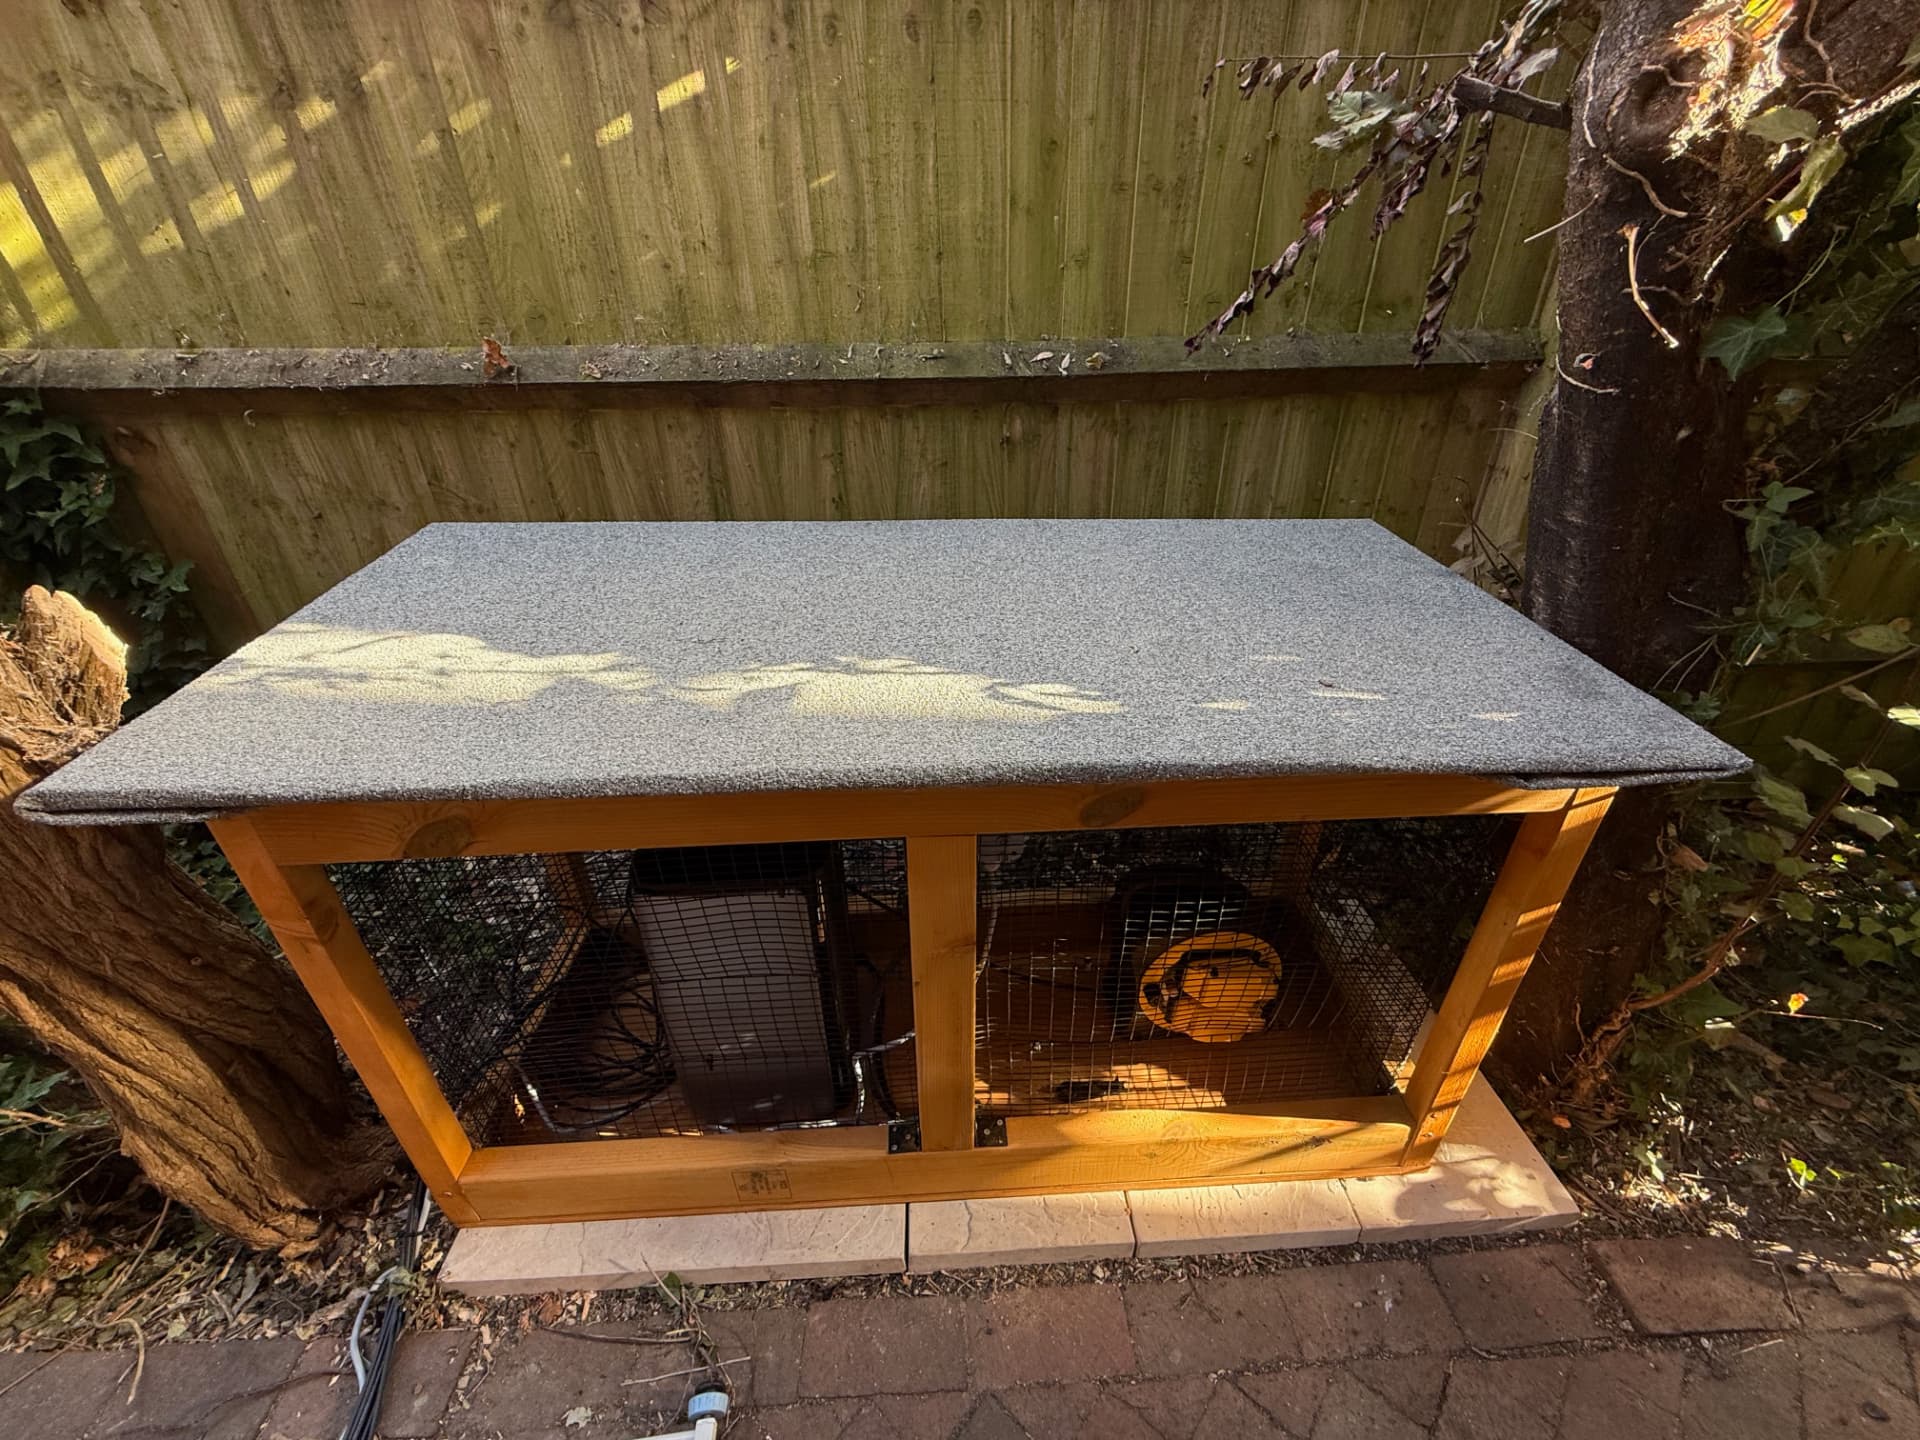
Build a solar hutch to keep your kit out of the weather.
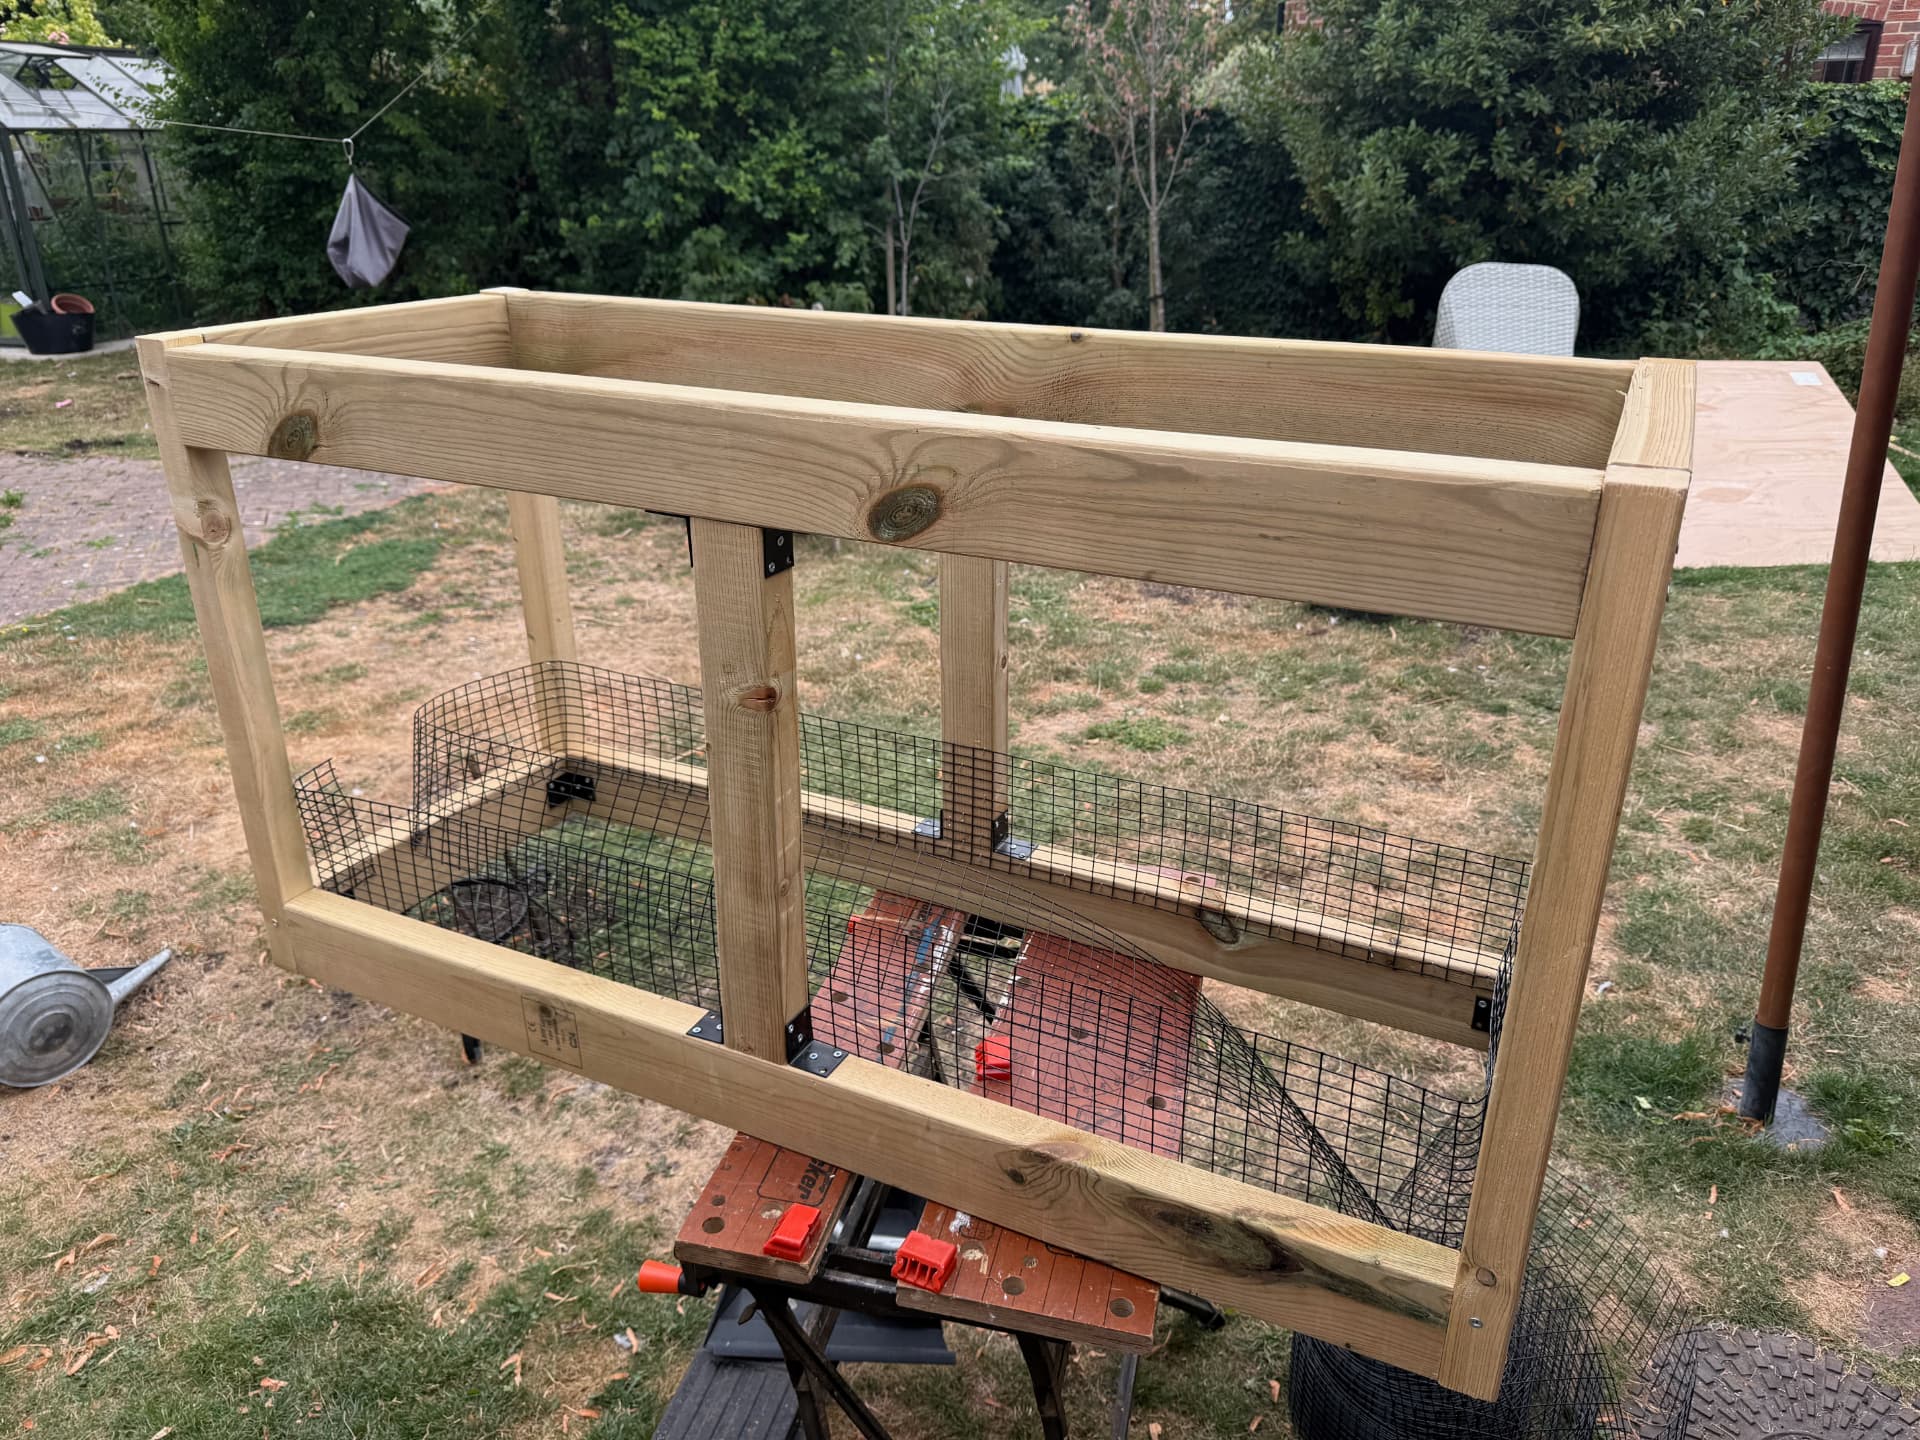
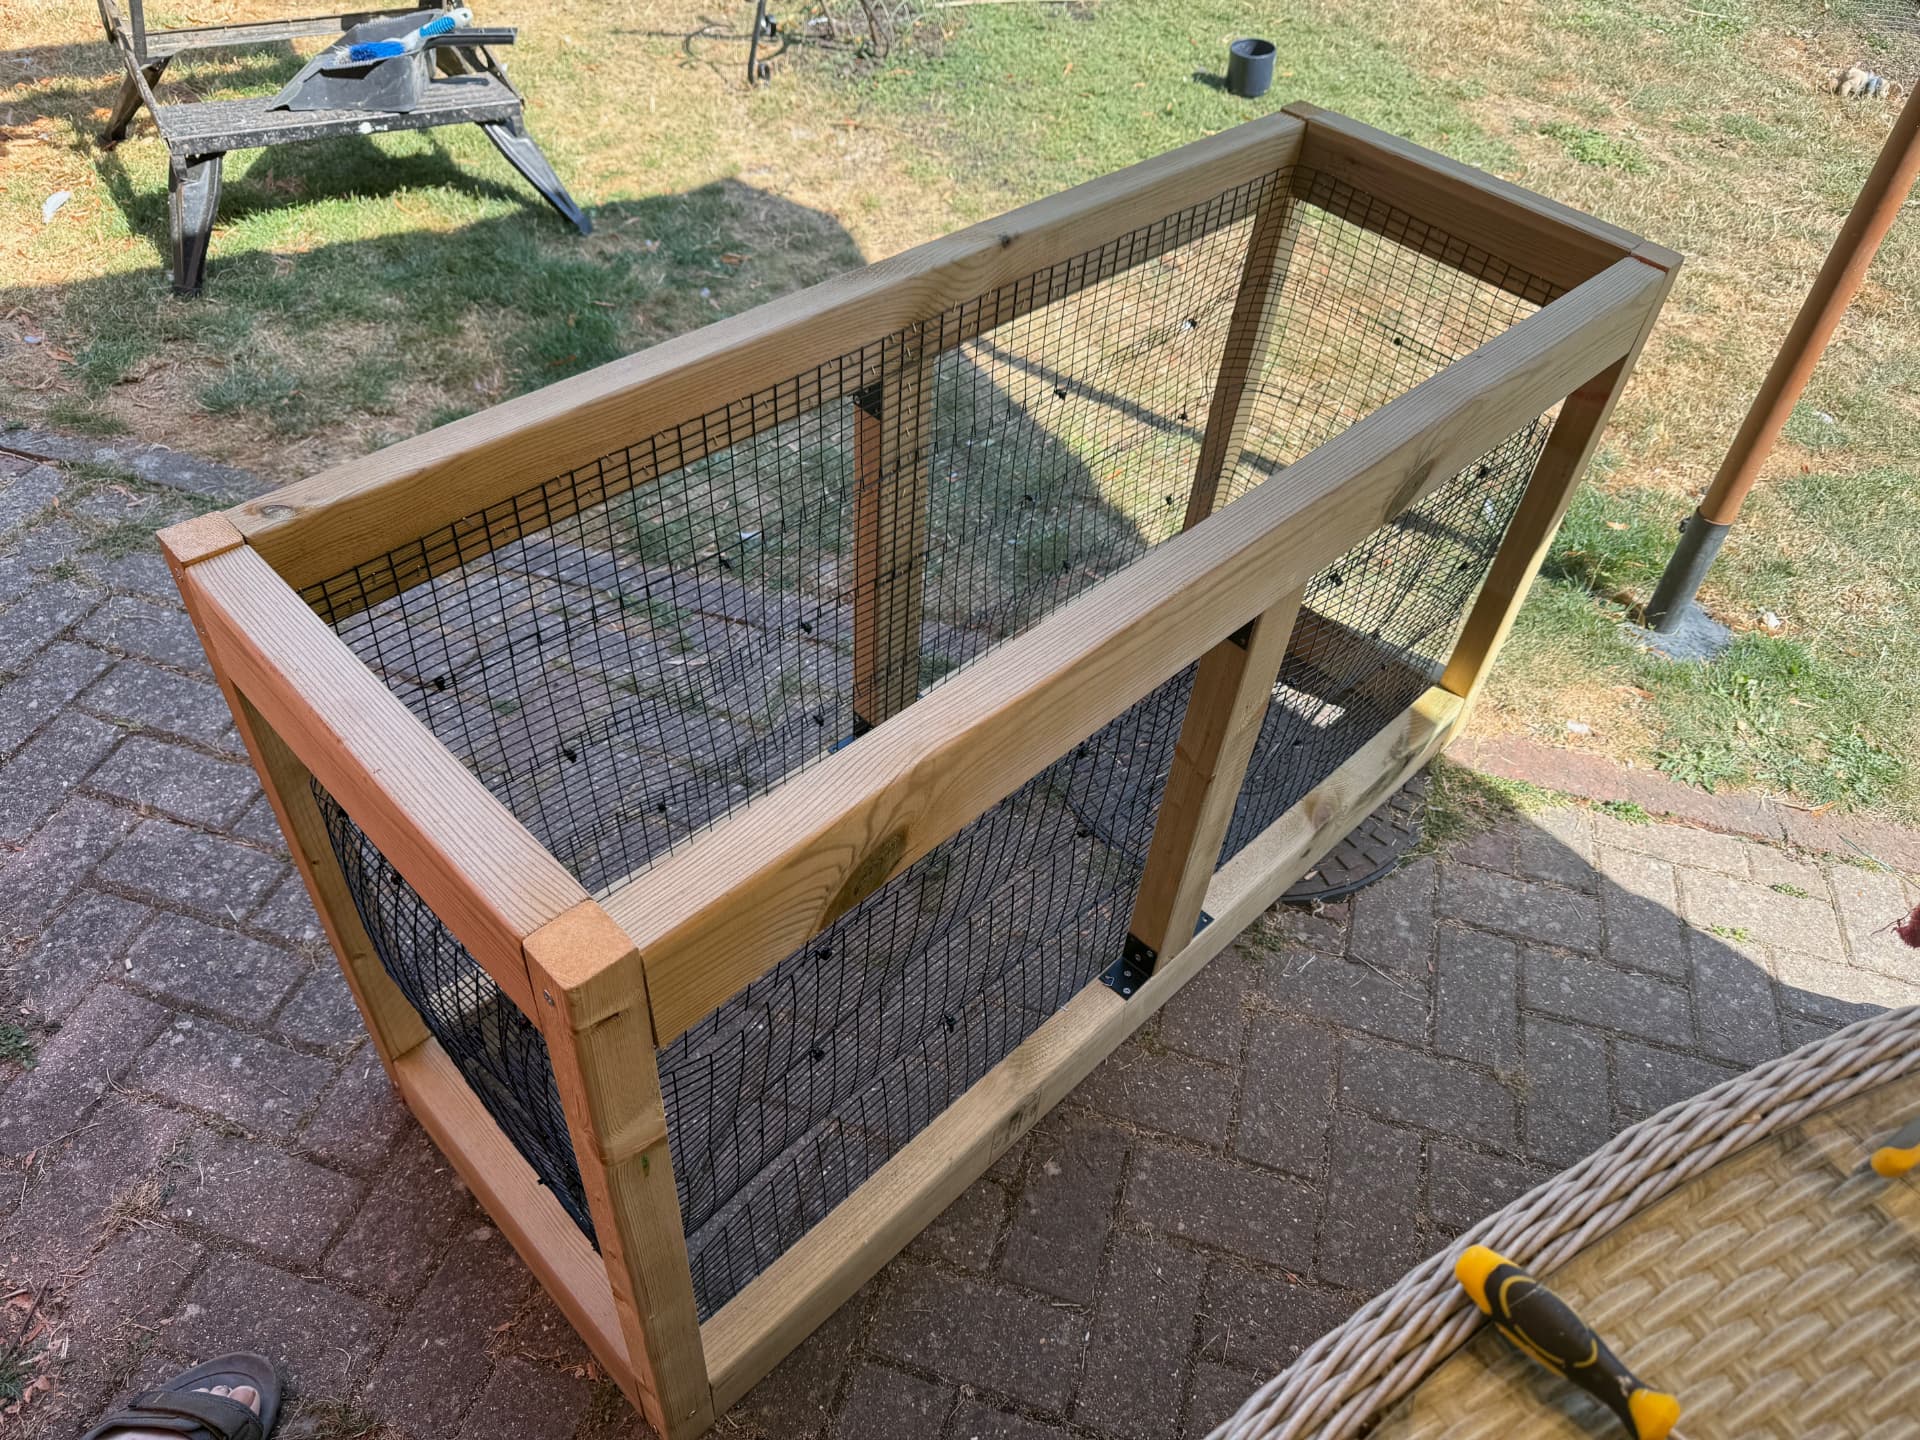
The inverter/battery unit needs to live somewhere dry, shaded and ventilated. I built a simple 'solar hutch' from treated timber: a basic box frame, mesh panels on the sides and back for airflow (and to keep animals and debris out), a plywood lid, then roofing felt over the top for waterproofing. It sits on paving slabs so it's off the wet ground, under a tree for extra shade, with the cables run in through the mesh. Total cost was modest and it took an afternoon or two — far cheaper than a garden cabinet and sized exactly to the kit. Keep the front open or fully meshed so heat can escape: batteries hate being cooked as much as they hate being soaked.
Battery & Backup
If you want backup power, don't let your battery's minimum charge get too low.
It's tempting to let a battery drain right down to squeeze out every last bit of solar storage — but if you want it for backup power, that's risky. Too low a minimum state of charge (SOC) and you could be caught out with 30 minutes of power or less when you actually need it. I've set mine to 17% minimum, which gives roughly an hour of fridge/freezer, phone charger, and router. That's a worst-case number — in daylight hours you'd hope for some solar top-up too, but it's never guaranteed.
A 1.92kWh battery is smaller than it sounds.
It's enough to get started and learn how you use power, but for me it's on the small side. Plan is to run it for a few months, watch the real usage data, and then decide whether to expand capacity — rather than guessing upfront. So far this summer my battery is full by midday and I am wasting solar energy.
EcoFlow's app doesn't show battery arbitrage savings.
The app tracks solar generation and home usage, but it doesn't account for the money you save by charging the battery on a cheap overnight rate and using that power at peak rate. If you're on a time-of-use tariff, the real financial benefit is bigger than the app suggests — you'll need to track that separately.
Why not just get a full 10–12 panel install?
A typical professional install runs to £10–12k. It will produce more energy and offer more storage, but not everyone has a suitable roof to take that many panels facing S/SW/SE, and it isn't DIY. Roughly half the cost is labour, which often pushes ROI out to 7–9 years — and if you move house in that time, an estate agent friend tells me solar adds £0 to your sale price. With a DIY plug 'n' play kit you can take it with you to the next place.